How to Manage the Web Form View
Custom views for the same web form responses list can be created to display, organize, or filter the columns of collected data differently. The content or collected data of the list does not change. For instance, you can create views using the following settings:
- Filter by a set of criteria
- Sort in a particular order
- Hide or show columns
- Group information based on list data
- Display subtotals of columns
- Show lists with date information as calendars or tables
You can make this custom view the default public view, so that when visitors go to a page that display a list, the filtered information will be displayed automatically.
Additionally, you can link to different views or design pages with Web Parts that use the different views. For example, a team might want to link to a view of a list that shows only the documents that were created by their team members.
Modify the web form view
- Navigate to the web form page you would like to modify a view for the responses (data) collected.
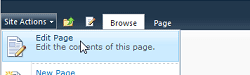
- Select Edit Page from the Site Actions menu to edit the web form.
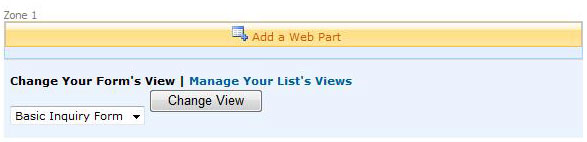
- Select Manage Your List's View to change the list settings for the form.
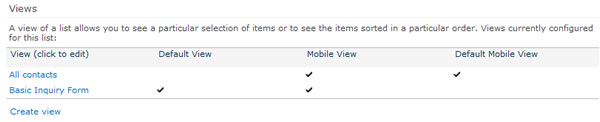
- Scroll down to the Views section of the List Settings page. You will see a list of the existing views created for this form list. Click on the name of the view you want to modify.
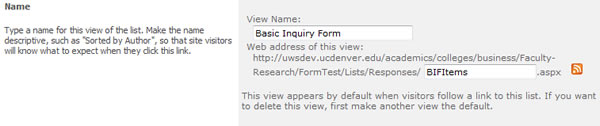
- In the Name section, type a descriptive name for your view (examples: Sorted by Last Name, Current Events, Alumni Students, Mobile, etc.).
You can also change the web address for this form view.
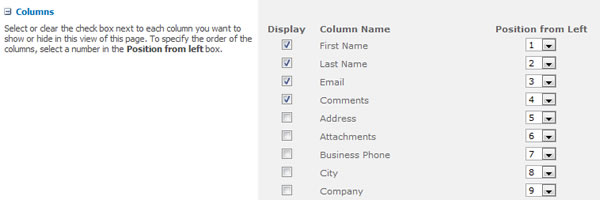
- In the Columns section, you can show or hide columns by using the Display check boxes. You can also change the order the columns are displayed in the view with the numbers in the Position from Left column drop downs.
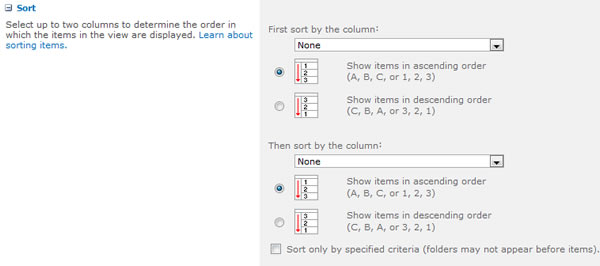
- In the Sort section, you can select how you want the list items to be sorted. You can use one or two columns for the sort.
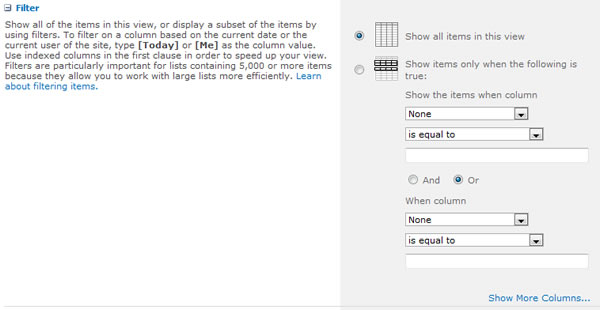
- In the Filter section, you can select how you want to filter the list items. A filtered view shows you a smaller selection of the list, such as only items that were created by a specific department or with an approved status.
NOTE: You can set up additional filters by using the "Show More Columns" link.
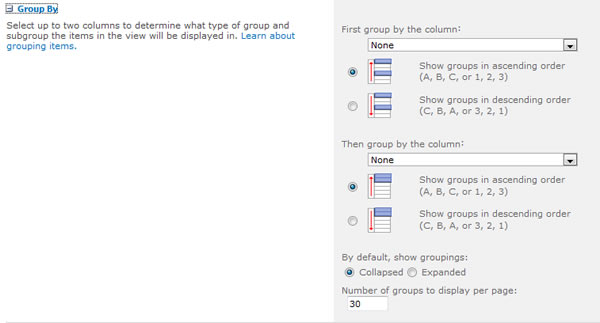
- In the Group By section, you can group items with the same value in their own section, such as items by a specific catgeory.
NOTE: You can select whether this group is shown in an expanded or collapsed view.
- In the Totals section, you can count the number of items in a column, such as the total number of issues. In some cases you can summarize or show averages.

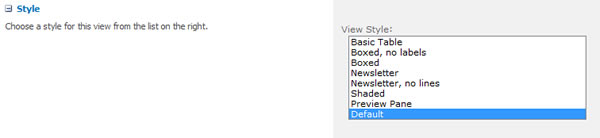
- In the Style section, you can select the style that you want for the view. You should experiment with these to see which best fits your needs.
- In the Folders section, you can create a view with or without folders. To view all of your list items at the same level, select Show Items Inside Folders.

- In the Item Limit section, you can limit how many items can be viewed in the list, or how many items can be viewed on the same page.

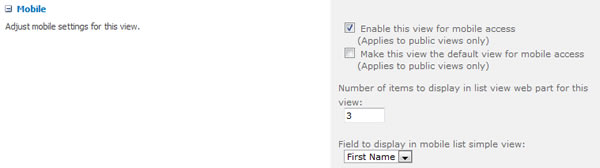
- In the Mobile section, you can select the options that you want in the Mobile section.
- When you are done making adjustments to your form view click OK