SharePoint 2010 - Advanced
How to use the table of contents web part
Table of contents
The Table of Contents Web Part has been configured to show sub sites and pages based on the site hierarchy. You can choose the number of site levels to display by editing the default options.
- Navigate to the page where you would like a Table of Contents Web Part to appear.
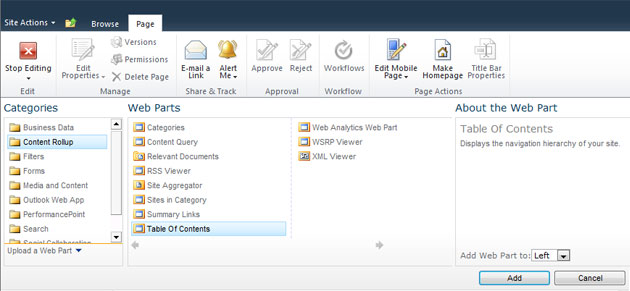
- Select Edit Page under the Site Actions menu.
- To insert a web part, choose Add a Web Part from one of the web part zones on the page, or place your cursor in a content area.

- Select the Insert tab in the ribbon, select the Web Part button.

- The web part gallery will open underneath the ribbon. The web part gallery shows the categories, web parts, and a description of the selected web part.
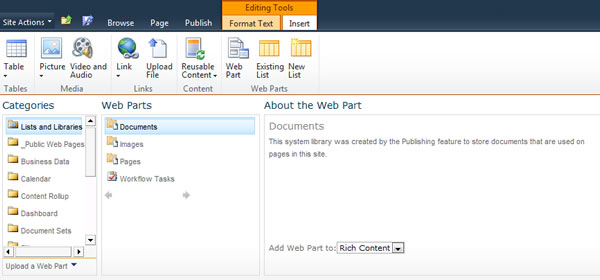
- To add the Table of Contents Web Part, select the Public Web Pages category and the Table of Contents Web Part. Click Add.
- Once the Table of Contents Web Part is placed on your page, hover your mouse over the title of the web part Table of Contents Web Part. Select the drop down arrow to the right side of this title. Choose Edit Web Part
- In the Edit Web Part window located in the upper right of your screen, you can choose various options including which subsite you wish to show, how many levels deep to show, and whether or not you would like to show pages. Under the Appearance section you can also adjust the title and dimensions of the web part.
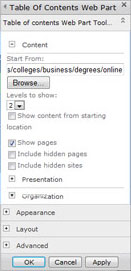
- Select OK to apply changes.
- When you are done making adjustments, Check In, Save and Close, or Publish your page.
- A pre styled table of contents should appear on your page.