SharePoint 2010 - Advanced
How to use and format tables
Tables
There are several ways to add a table to your content page:
- Add a table from the ribbon
- Add a table from the reusable content library
- Write your table code directly in the HTML view
Tables can be placed in content areas on your pages: Page Content Local Navigation, Page Content Sidebar, or Page Content
Adding a Table from the Ribbon
- Navigate to the web page in your site where the table will be inserted.
- Select Edit Page from the Site Actions drop-down menu.
- Click your cursor in the appropriate content area on the page where you want to insert the table.
- Select the Editing Tools in the ribbon, click on Insert
- Select the Table button. You will see a drop-down menu that will allow you to choose the number of rows and cells for the table. Use your cursor by clicking and dragging over the grid to select the appropriate number of rows and cells.
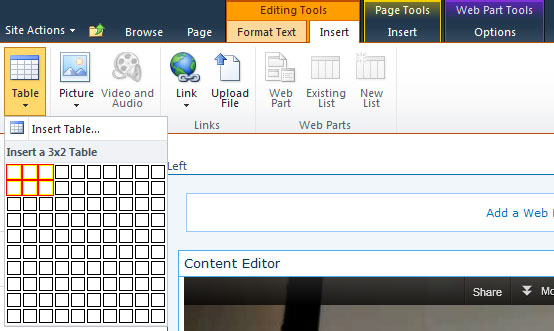
- Click on the lower right most cell in the insert table picker grid that you selected, and the table will be added to the page.
- A new Table Tools ribbon will appear that will allow you to configure the table. It will have sub tabs called Layout and Design
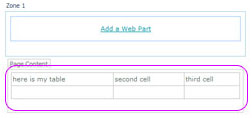
- You may now type directly in each table cell to add your content.
NOTE: Use the Tab key on your keyboard to switch to the next cell or add a new row at the end of your table.
- You may edit the HTML source of the table by selecting the Format Text tab under Editing Tools on the ribbon. Select the HTML button and Edit HTML Source option.
To apply style to your table, surround the table HTML code with the following <div> tag and HTML class of "contentTable".
<div class="contentTable">table code goes here</div>
- When done making your changes, you are now ready to Save and Close, Check In, or Publish the page.