SharePoint 2010 - Advanced
How to Create a New Site in SharePoint
You must have a certain level of permission to be able to create a new site. If you need to make a new site, and do not see New Site as an option under Site Actions in the ribbon, contact your Site Owner or the CMS administrator.
- Navigate to the site under which the new sub site should be created.
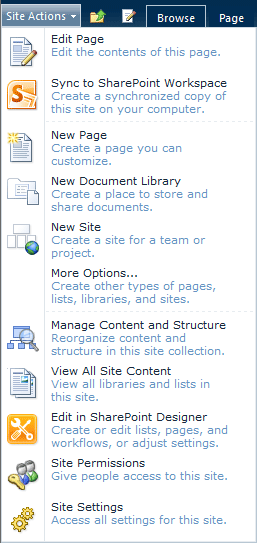
- After you have logged in, on the site’s home page click the Site Actions button opening the Site Actions menu.
- Click Site Actions, and then click New Site

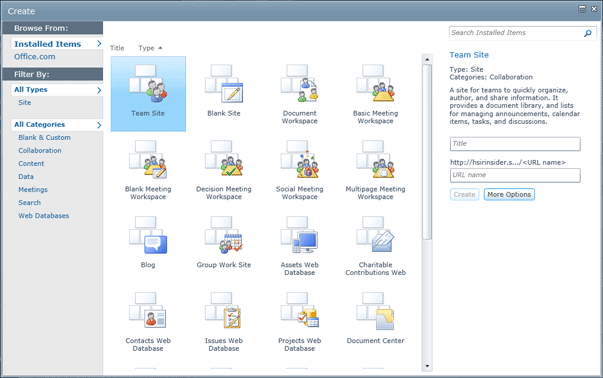
NOTE: The Create New Site dialog menu will open. If you do not see the New Site option, you do not have the proper authorization.

Step 1: Choose a Template
- Choose the Template on which the site should be based. The template identifies the default format and components included in the site. Please refer to Which Template Should I Choose? for more information about templates.
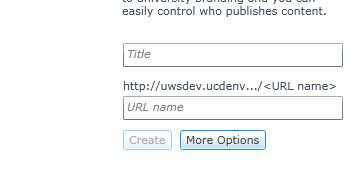
- In the Title field, type a name for your new site
NOTE: The title is the site name that will display throughout the pages on your site, including in the navigation.
- Enter the URL name for the site.
NOTE: You can make this the same as the site title or rename to something that is short and easy to reference. Do not include spaces or special characters in the URL name. See the Search Engine Optimization (SEO) resource for more information on how to organically improve your search ranking and choosing a URL name. 
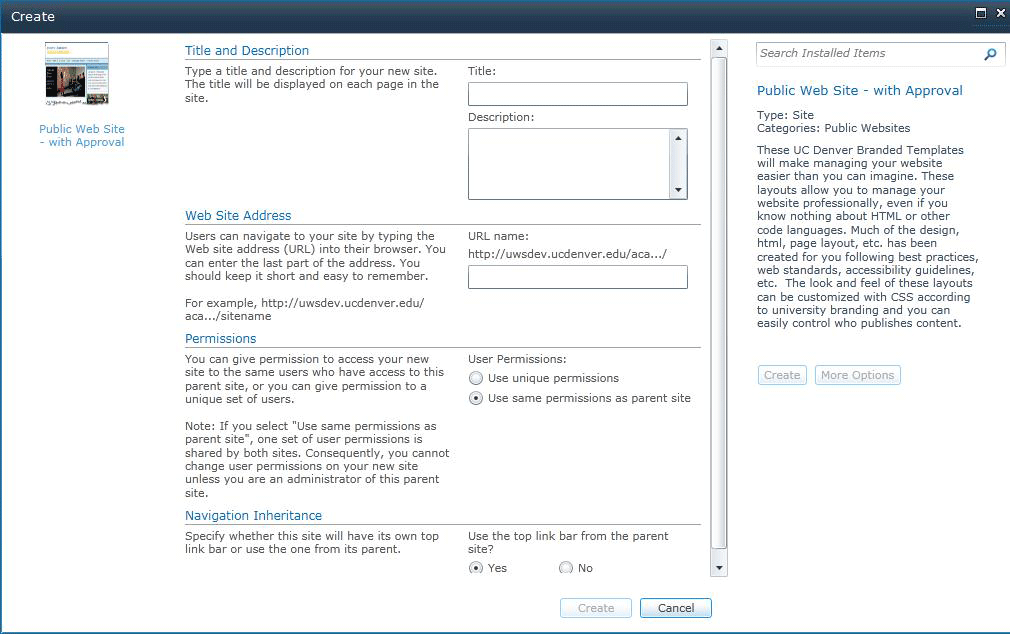
- To add description, choose More Options. The advanced Create Site menu will appear.

- By adding a Description, you will be aiding the search relevance ranking for the site. Think of the description as metadata that will help visitors find and understand your site.
- Use the same permissions of the parent site for Permissions. When you opt to use the same permissions, security will be based on the permissions of the parent site. Even if you want unique permissions, this ensures that all the necessary groups are provisioned with the site. Then you can change the permissions to be unique if applicable.
- In the Navigation Inheritance, if you are building your site to have unique navigation, then select the navigation bar should list the subsites under the current site at the site root level. As you build out the information architecture, the site navigation will be displayed. For, subsites in your structure, more than likely, the navigation bar should inherit the options listed in the parent site’s top link bar.
Once all of the necessary information has been entered or selected, click the Create button. A set of standard folders will be created, including the following:
- Documents: storage for all documents you upload and publish to your site
- Images: storage for all images you upload and publish to your site
- Pages: storage for all pages in your site
- Workflow Tasks: not currently in use
The navigation is linked automatically and the Default site home page opens.


