2. Place your cursor in the web zone where you want the image to be (or in a Content Editor web part, or the edit view of a list item such as an Announcement).
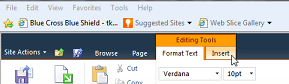
3. In the Editing Tools menu, select the Insert tab.
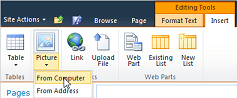
4. In the ribbon, click on the arrow below the Image option, and select From Computer.
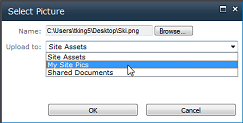
5. Click Browse and browse to the location on your PC where you have the picture saved.
6. Select the SharePoint picture library that you want to store the picture in the Upload to drop-down, then click OK.
7. Confirm the upload to the chosen picture library by clicking Save in the resulting window.
8. Select Save & Close (or Publish, if applicable) in the ribbon menu and the image has been added to the page.