How to Add a Column or Field
- Navigate to the web form page you would like to modify.
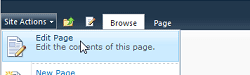
- Select Edit Page from the Site Actions menu to edit the web form.
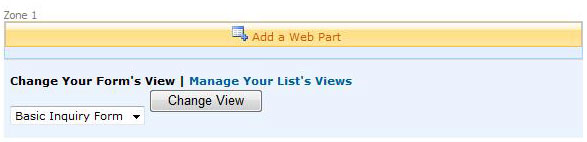
- Select Manage Your List's View to change the list settings for the form.
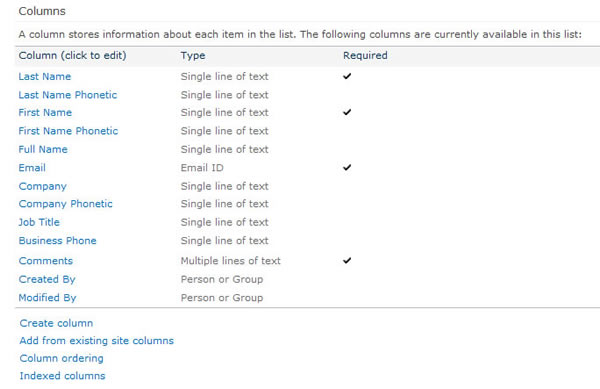
- Scroll down to the Columns section of the List Settings page. You will see a list of the existing columns (or fields) in the form and below that a Create Column link. Select the Create Column link.
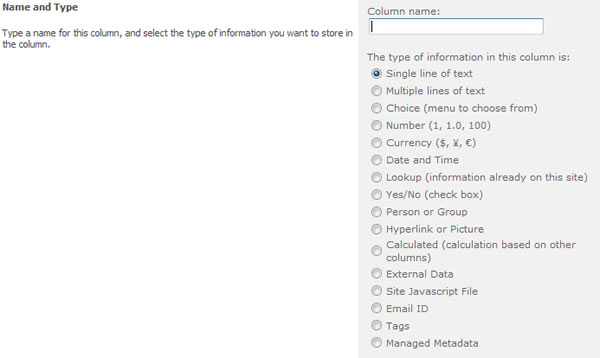
- In the Name and Type section, complete the Column name field and select the Type of Information you want to store in this column from the list of options (single line of text, multiple lines of text, choice, number, etc.).
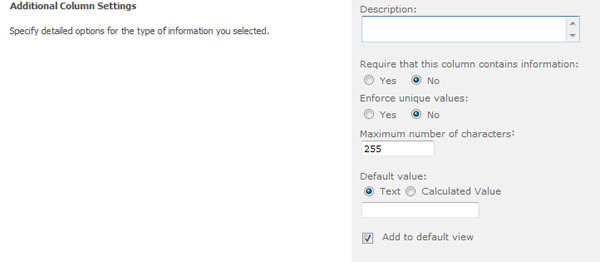
- In the Additional Column Settings section, type a description in the Description field to provide additional information or instructions for this form field.
NOTE: This description is optional. You can also select whether or not this form field is required or displayed in the default view.
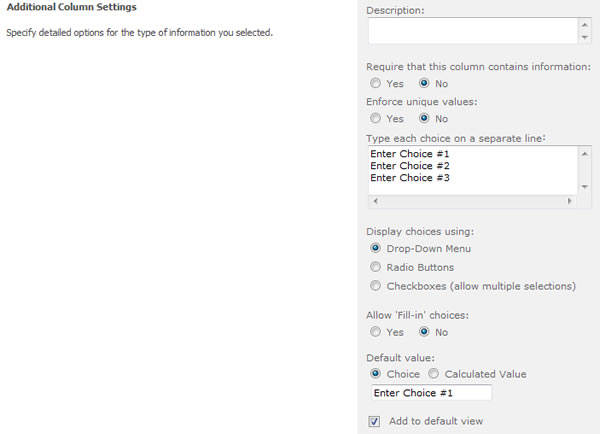
NOTE: Depending on the type of column that you selected, more options may appear in the Additional Column Settings section. For instance, if you choose Choice (menu to choose from), you will list each choice on a separate line and choose how the choice is displayed—drop-down menu, radio button or checkboxes.)
- To add the column to the default view of the form, select the check box Add to Default View
- When you are done making adjustments, click OK. You should now see this new column in your Form List Settings page.
NOTE: Columns added after data has been collected will be blank in existing records.